Database Field Condition
Database Field Condition Instructions
-
Step 1
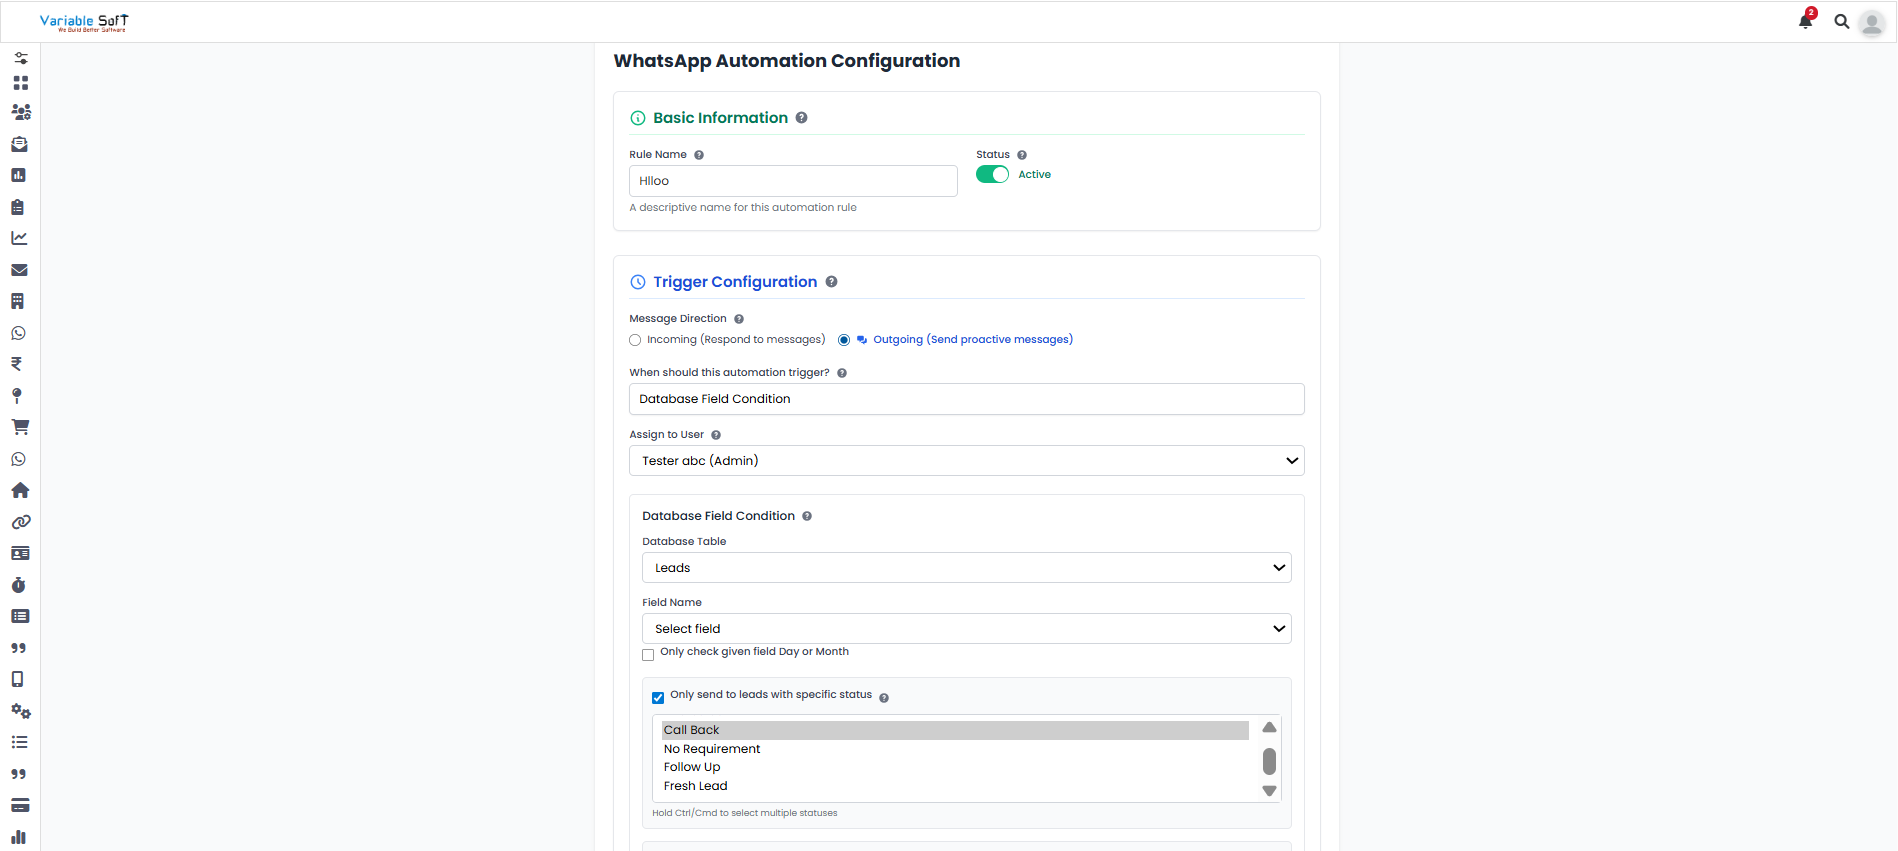
When you click on the Add Sequences button, a WhatsApp Automation Configuration page will open. Here, you need to fill in the basic information first.
-
Step 2
In the Trigger Configuration section, click on Outgoing (Send proactive messages). There you will see an option titled “When should this automation trigger?” — If you choose the Database Field Condition option.
-
Step 3
After selecting it, assign a user. In the Database Field Condition section, select a Database Table field and then choose a specific status to send leads only to those according to your requirement.
-
Step 4
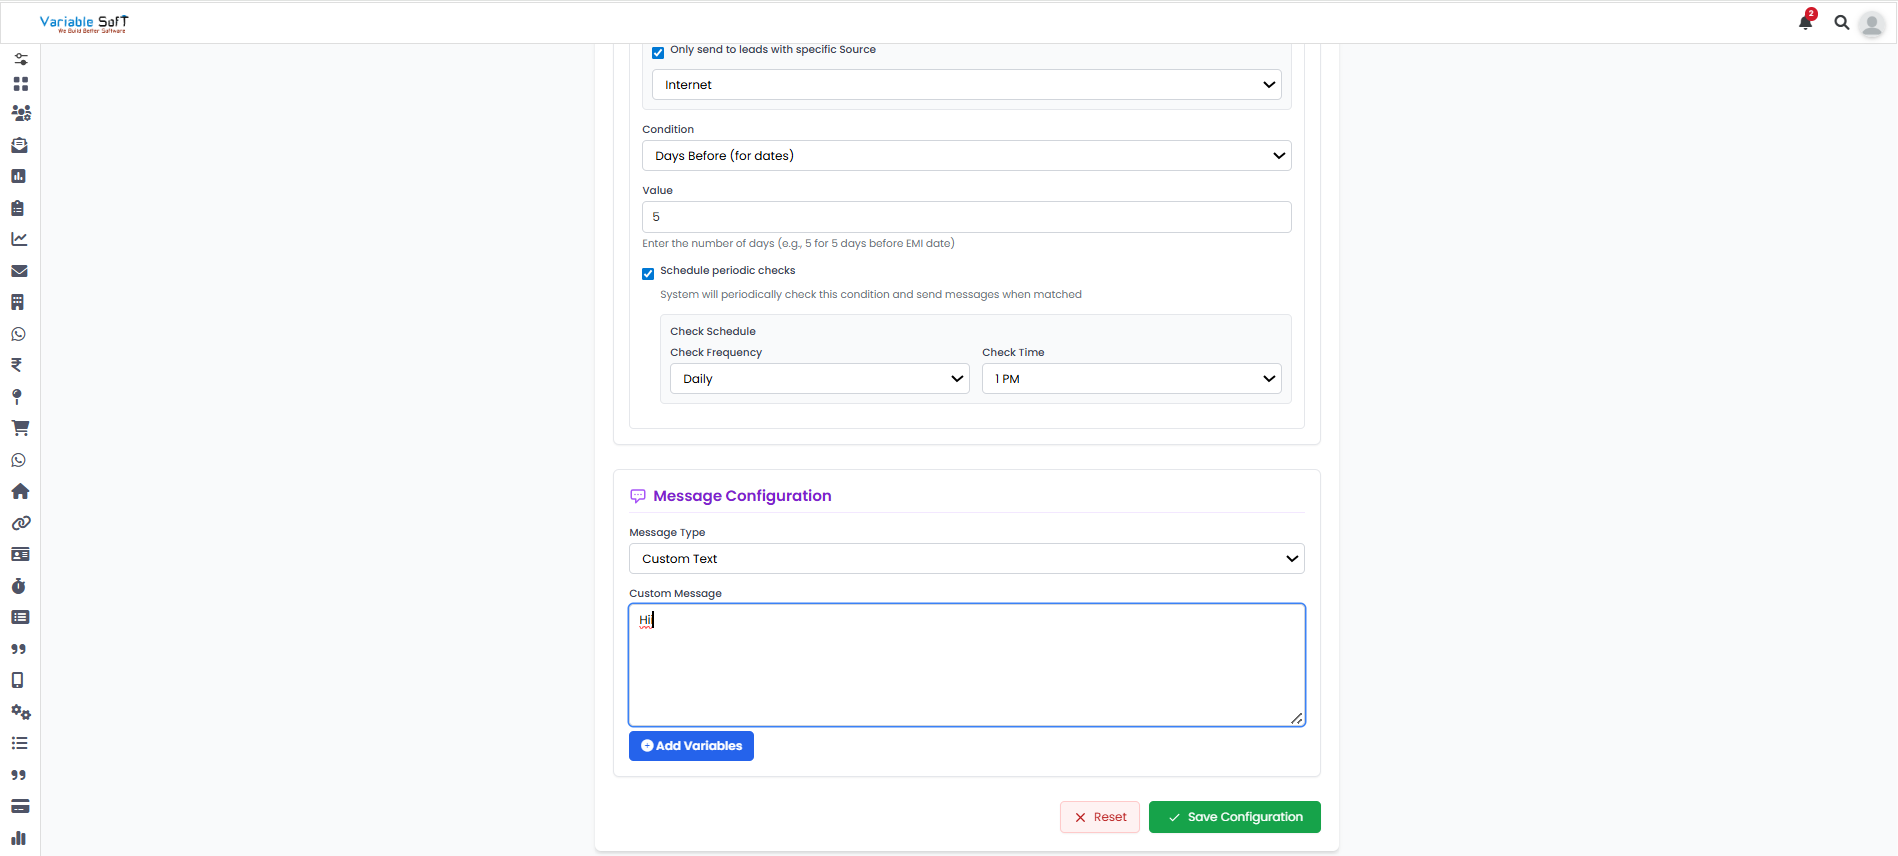
Then, choose a specific source to send leads only to them according to your requirement. Next, select the condition according to your requirement. Based on your chosen condition, more options will appear automatically — fill them as per your need. After selecting the condition, click on “Schedule periodic checks”, where you can choose the Check Frequency and Check Time.
-
Step 5
In the Message Configuration section, select the Message Type as per your preference. Once you choose the message type, additional options will appear — fill them according to your requirement.
-
Step 6
After confirming all your details, click on the Save Configuration button. Your sequence will be successfully added.
⚠️ Important Note
Make sure to review all selected options carefully — especially your conditions and message type — before saving your configuration to avoid errors.